


move your mouse over the picture
 Raw RGB levels and their interpretation
The software Raw Digger ( see here ) allows the analysis of raw RGB data contained in the raw files generated by our cameras. In fact, this software allows you to directly open raw files and displays the histograms of data. Have access to the raw data allows the analysis of the behavior of our raw development softwares by comparing the developed files the raw datas. It should be understood that the software used to convert raw files into final images interprets raw data files and each software his own behaviour, chosen on aesthetic and technical requirements.
In this page, we'll try to see how are rendered RGB levels contained in the raw files, primarily in midtones and highlights since these values subject to interpretation.
CMOS or CCD sensor " see" light with a gamma 1 and the raw data the sensor are representative of this characteristic: you double raw RGB value (for example RGB from 1000 to 2000) it means the sensor has received 2 times more light, whether 1EV to put it more simply). From these raw datas it is easy to connect the photographic units (Ev or diaphragm) and RGB datas.
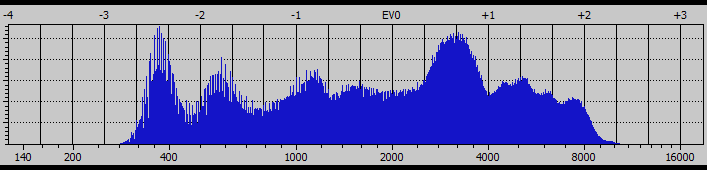
Ev 0 was arbitrarily set to 2000 in Raw Digger to simplify the reading of this graph
we clearly see that doubling the raw value (bottom number) means +1 Ev (top
number)
Actually, electrical signal from sensor is usually sampled in 14 bits, it means that each photosite can output 214 values, or 16385 possible values (0 to 16384). Bayer mosaic used on the majority of current sensors provides twice more
photosites filtered in green than red or blue photosites. The resulting datas contain twice more " green" datas than blue"
or " red" datas.
To simplify demosaicing operations, " green" datas are grouped into
two same size layers, the raw file contents is 4 ( not 3! ) distinct layers:
- layer R (red),
- layer G1 ( green 1),
- layer B (blue)
- and finally the second layer 2).
It is for this reason that the histograms displayed on this page show two green layers, one red layer and one blue layer, these layers
have the same number of pixels.

Level analysis of a raw file
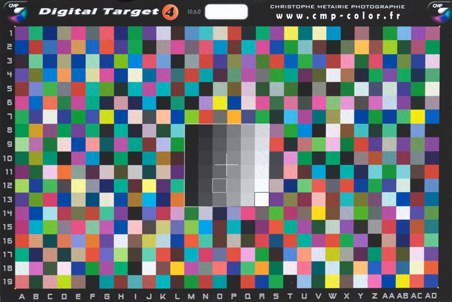
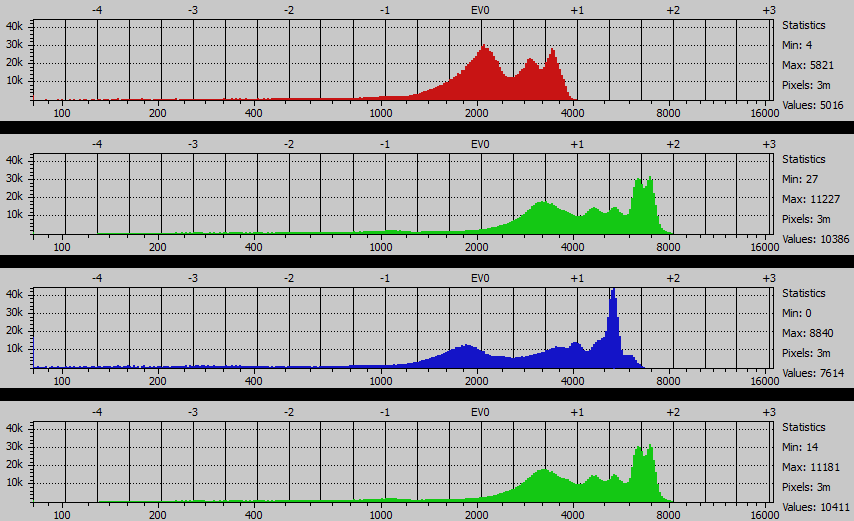
CMP Digital Target 4
Nikon D700, flash lighting, raw mode
We study here a raw file shot of the Target 4 ( used to calibrate the camera - see here ), the shot was made with a Nikon D700 and flash lighting. set at the limit of clipping in highlights, to have a exposure and a complete histogram in the highlights.
The screenshot below ( made with Raw Digger ) shows the raw RGBG histogram of the shot above. We see clearly that the highlights are not clipped and the exposure is correct: on the green channel 2, the maximum is 14,319 while the maximum theoretically possible is 16384 (data is in 14 bits so 2 14 = 16384) or 0.20 ev below the maximum and there is more room on the other channels.
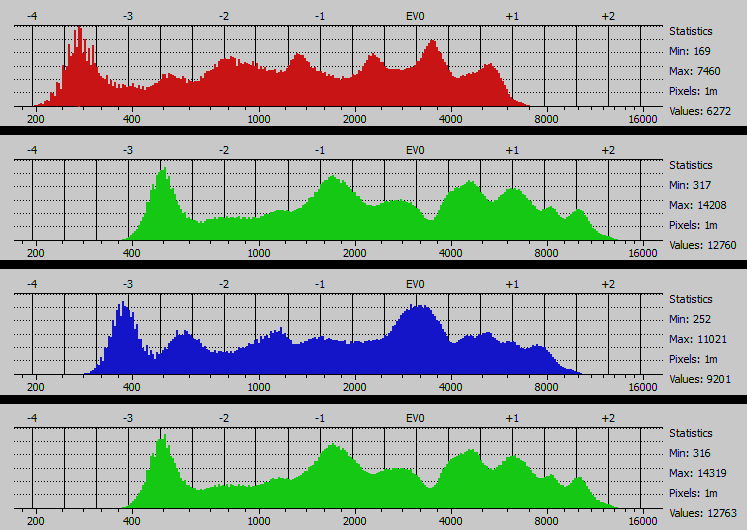
raw datas histogram - CMP Digital Target 4 shot
Nikon D700, flash lighting
horizontal axis: raw value in 14 bits: 0 to 16384
A selection of 8 gray patches was made on the central part of the CMP Digital Target 4 as follows:
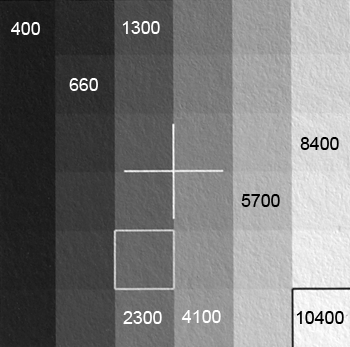
average levels of raw datas for selected patches
This value is the value of each patch on the raw file ( 16 bits )
To determine the value, an average was performed on the 4 layers RGBG.
The RGB levels of the 8 selected gray patches ( see above ) were observed on the output tiff files of each software, the following graph results from this study:
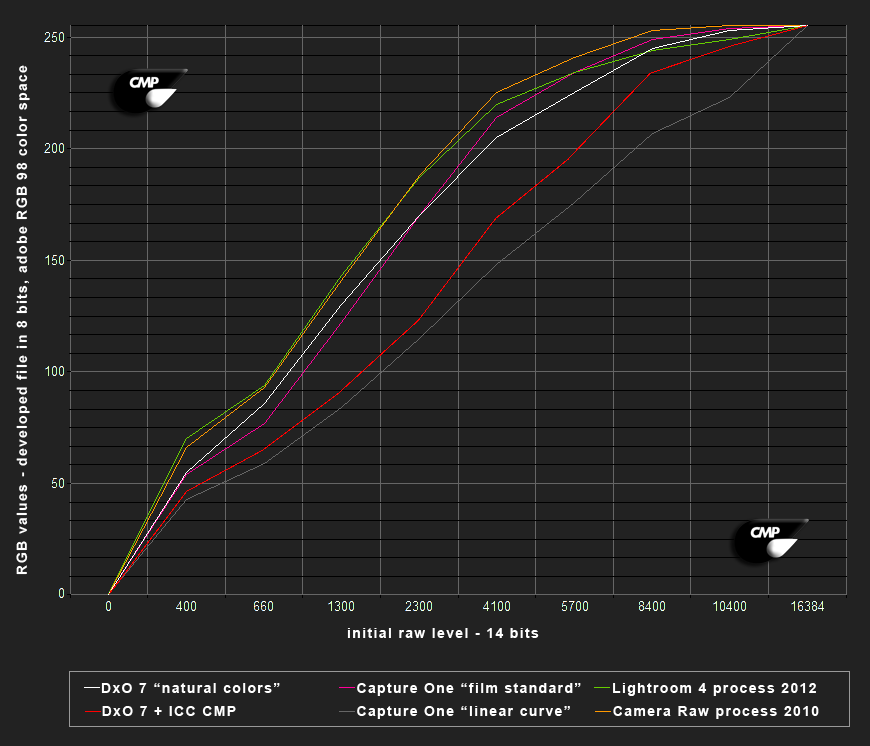
horizontal axis: initial raw data RGBG (average of 4 values)
the vertical axis represents the 8 bits RGB value (average of 3 values) after development in adobe RGB 98 color space
The chart above helps to understand what was the developer's intent: a reflection of the internal processing of each software with a standard configuration.
The flattening of the curves in the highlights is representative of visual sensation of compression in the highlights on all outputs, except Capture One / linear contrast and with custom ICC profiles:
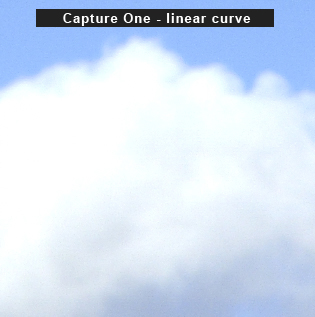
Capture One / linear contrast: as its name indicates correction other than the gamma correction 2.2 performed on the raw data ( and of course color correction ). This results is lacking contrast but totally neutral and the datas on your file. This atypical rendering requires a little work your part to find corrections to your file (contrast, curves ...).
DxO with CMP custom ICC profiles: rendering is halfway between Capture One " linear contrast" curve and renderings with a flattened top end curve, it is a good way to maintain natural highlight while having enough contrast. In my opinion this type of rendering is much more universal as basic rendering to start on a picture. This is why I chose these kind of curves in my ICC profiles.
|
Many developers made a deliberate choice to compress highlights to the top end. It can be explained in the case raw file contains strongly overexposed areas: the transition between highlights and clipped areas is smoother and becomes indetectable to the eye
since the curve has no sharp angle on the clipping point (255 in 8-bit RGB).
|
Examples
On examples below, developments done with Capture One contrast and DxO + ICC custom profile corrected with exposure correction ( around +0.6 Ev ) to correct the loss of overall density to the flatter curves , these are the only corrections done on the files. other versions, default softwares settings have been applied. It would have been possible to manually optimize all developments settings but the purpose of this article is to try to understand the behavior of each software, so I chose to use the default settings without any manual tweaking.
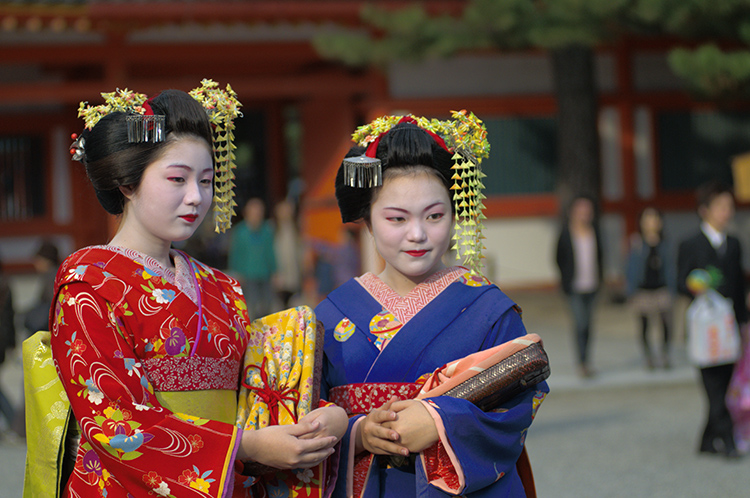
Henri Culubret photography - Nikon D300 - Japan, Kyoto
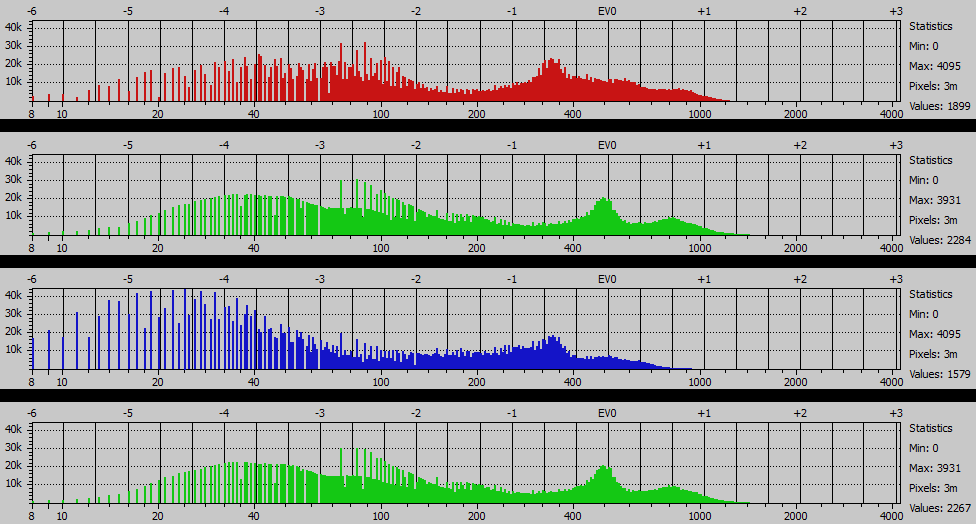
raw histogram of the picture above, the nikon D300 body was set to 12 bits, the RGBG max value is 4096 ( 212 )
we can see clearly that this shot is well exposed and there is absolutely no clipping in highlights
Henri Culubret photography - Nikon D300 - Japan, Kyoto
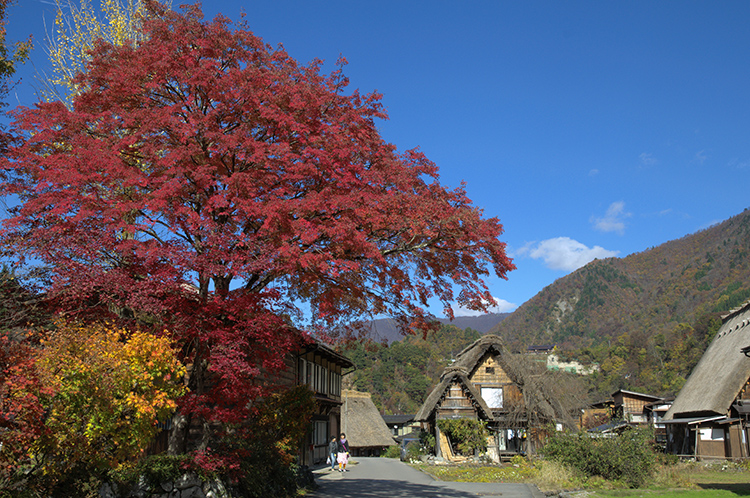
Henri Culubret photography - Nikon D300 - japanese Alps, Shirakawa
raw histogram of the picture above, the nikon D300 body was set to 12 bits, the RGBG max value is 4096 ( 212 )
we can see clearly that this shot is well exposed and there is absolutely no clipping in highlights
Henri Culubret photography - Nikon D300 - japanese Alps, Shirakawa
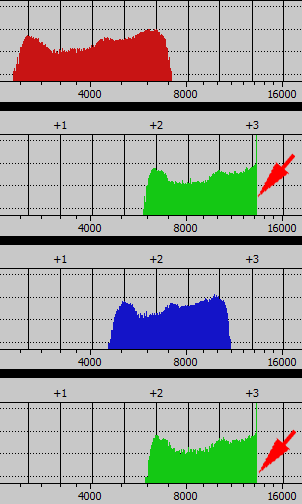
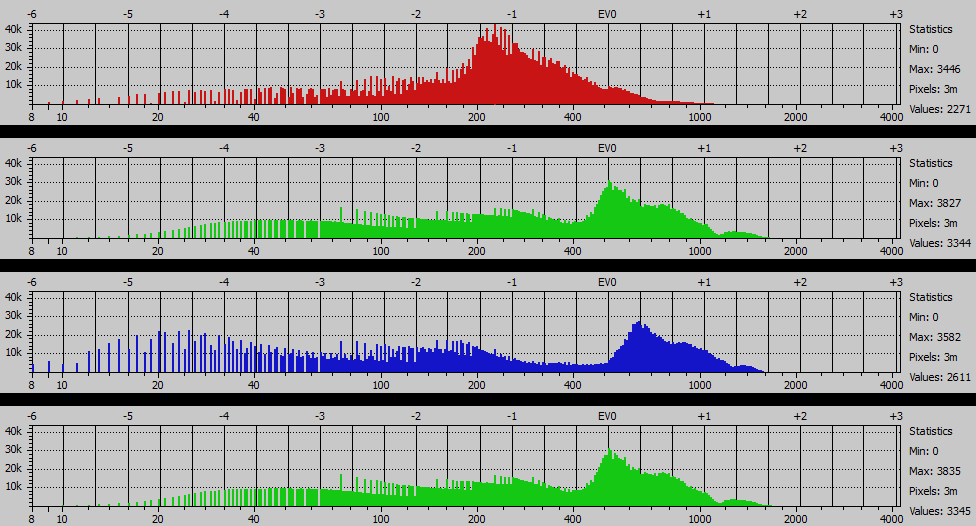
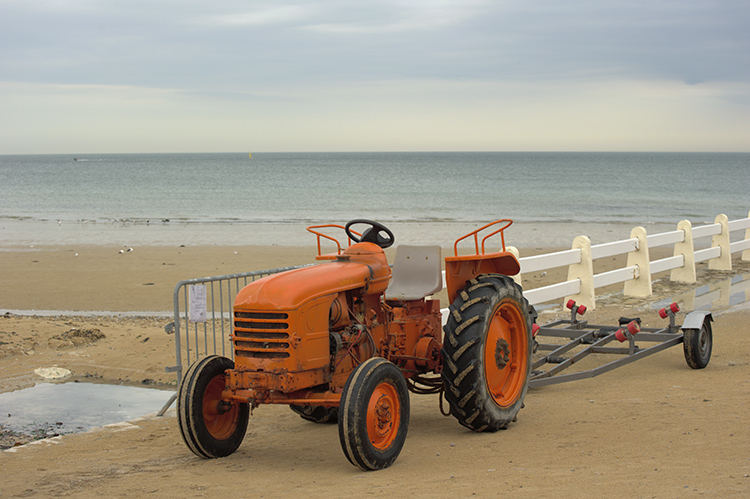
Michel Billi? photography - Nikon D700
raw histogram of the picture above, the nikon D700 body was set to 14 bits, the RGBG max value is 16384 ( 214 )
we can see clearly that this shot is well exposed and there is absolutely no clipping in highlights
Michel Billi? photography - Nikon D700
Copyright (c) 2025 christophe metairie photographie - Tous droits reserves